![]()
![]()
![]()
![]()
Microsoft PowerPoint is a multimedia presentation program for creating overhead transparencies, 35mm slides, and on-screen electronic presentations. In addition to your presentation you can create and print "Notes Pages," which contain scripts for each slide and serve as your notes during your presentation, print an outline of your presentation, and print hand-outs of each slide for your audience.
Creating a presentation is simplified with the aid of “Wizards” and templates which help you get started with the basic design of your presentation. Wizards guide you in developing your idea and designing your presentation. Templates apply a predesigned color scheme and text layout to your slides.
After starting PowerPoint you have the choice of either creating a new presentation or opening an existing presentation.

There are four choices for creating a new presentation. The choice you choose depends on how much and what type of guidance you require in getting started.
AutoContent Wizard -guides you in determining the content and organization of the presentation.
Pick a Look Wizard - guides you in determining the look (design) of the presentation.
Template -guides you in determining the color scheme, text layout, and other design features of the presentation.
Blank Presentation -allows you to begin developing your presentation with a predefined color scheme and text layout design.
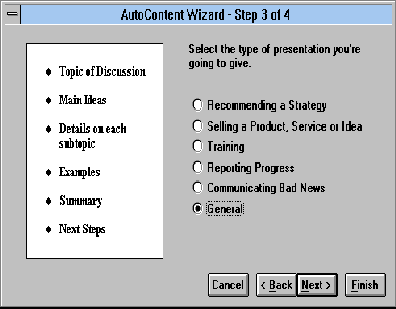
The first time user should choose the AutoContent Wizard to get started. The AutoContent Wizard will guide you through creating your title slide and choosing what type of presentation you want to create by selecting a presentation category. Depending on the category you choose an outline will be generated with predefined titles and text. The predefined titles and text serve to guide you in organizing your presentation and can be replaced with your own titles and text.
Presentations can be developed in one of any four "views". Each view shows one or more slides in a unique style for editing and organizing your presentation. Within each view you can add special effects which enhance the transition from one slide to the next and spell check your text. The different views are provided to enable you to work with your electronic presentation in much the same way you would with actual 35mm slides or transparencies.
The most often used view is the outline view. The outline view provides a view of the title and text of each slide. Slides can be moved and resorted by clicking on the corresponding slide icon and dragging it to it's new position. The text font and size can be easily changed for one slide or a group of slides at one time by clicking and dragging the mouse over the text to be modified and then choosing the new font and/or size. New slides can be inserted at any point. Slide titles can be easily converted to subtitles by pressing the Tab key after selecting the intended text. Likewise, subtitles can be quickly converted to titles by pressing Shift-Tab after selecting the intended text. Outlines can be exported to WordPerfect, and likewise, a WordPerfect outline can be imported to PowerPoint. Thisallows course syllabus text created in WordPerfect to be brought into PowerPoint, sorted and organized for a presentation.
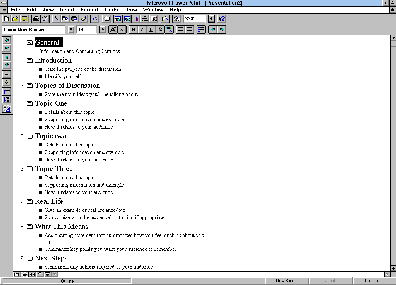 Outline View
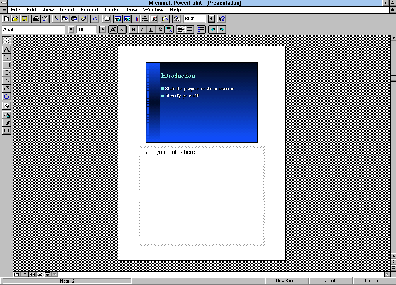
The Slide View allows you to work on one slide at a time. You can type text, change the layout, draw shapes, and import graphics from other programs.
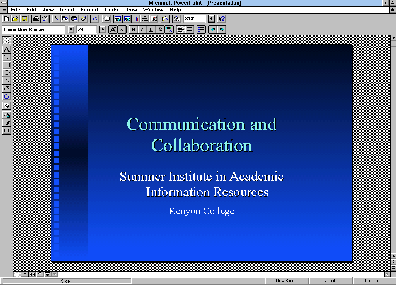 Slide View
Slide Sorter view allows you to see more than one slide at a time in miniature scale. The slide sorter view allows you to get a bettersense of how your slides flow and reorder them as necessary. In addition, the slide sorter view allows you to practice and time your presentation so that you can be sure to complete your presentation within a predetermined time limit.
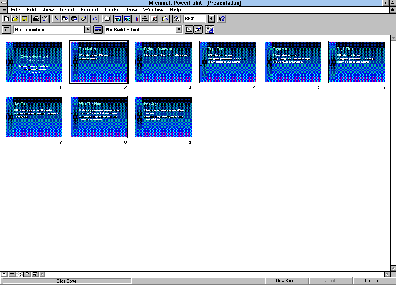 Slide Sorter View
In the Notes Pages view you can create notes for use during your presentation which will accompany each slide. These pages are printed out and referenced to keep your presentation on track. The Notes Pages may contain drawings as well as text just like slides.
 Notes Pages View
A fifth view, Slide Show view, allows you to see your finished slide but does not allow you to edit it. You must be in one of the other four views to edit your slide. The Slide Show view allows you to see your presentation as an electronic slide show. You will be able to see the effects of any transitions and timing you've incorporated into your slides.
 Slide Show View
You can freely move from one view to the other without disrupting any of your work. Simply click on the corresponding view icon at the bottom of the PowerPoint window.
![]() PowerPoint Views
PowerPoint Views
There are three "toolbars" usually available while you are using PowerPoint. These toolbars contain buttons which substitute for commands which are also found in the main menu. The Standard Toolbar contains buttons for common functions used throughout PowerPoint. The Format Toolbar contains buttons for functions dealing with the formatting of slides. The Drawing Toolbar contains buttons for creating objects on slides.
No matter where you are working in PowerPoint you can always access the Standard Toolbar. The Standard Toolbar contains buttons for doing such things as saving your presentation,
printing, spell checking, inserting graphics and charts, and cutting and pasting objects.
![]() Standard Toolbar
Standard Toolbar
The Formatting Toolbar allows you to adjust how the text on your slides look by setting the character font, size, and attribute (super/subscript, bold, italics, underline, shadow, color, justification, linespacing, and indentation).
![]() Feature Toolbar
Feature Toolbar
While you are working in the Outline, Slide, or Notes Pages view you can access several tools located on the Drawing Toolbar for enhancing the text of your slides. The toolbar contains tools for drawing lines and shapes. In addition, the toolbar contains tools for modifying the lines and shapes you draw.
![]() - Selection Tool - Select an object on the slide to modify.
- Selection Tool - Select an object on the slide to modify.
- Text Tool - Type text anywhere on your slide.
- Line Tool - Draw one line at a time of any length.
- Rectangle Tool - Draw a box anywhere on your slide.
- Ellipse Tool - Draw a circle anywhere on your slide.
- Arc Tool - Draw an elipse anywhere on your slide.
- Polygon Tool - Draw a polygon or freehand line anywhere on your slide.
- Free Rotate Tool - Rotate selected object to any angle.
- Autoshapes - Shows or hides the autoshape toolbar (contains predrawn shapes).
- Fill On/Off - Adds or removes the default fill color from selected object.
- Line On/Off - Adds or removes the default line color from selected object.
- Shadow On/Off - Adds or removes the default shadow color from selected object.
PowerPoint will accept graphic images in many common formats, such as: BMP (Windows). DXF (AutoCAD), GIF (Compuserve), CDR (Corel Draw), WPG (WordPerfect), EPS (Encapsulated Postscript), PCD (Kodak Photo CD), PIC (Lotus 1-2-3 Graphic), TIF (Tagged Image Format), and others.
To insert an image into one of your slides select the INSERT | PICTURE menu item from the main menu bar.
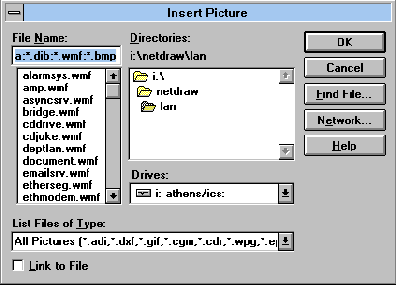 Insert Picture Dialog Box
By default, PowerPoint will list all file formats it can accept. If you wish to limit the list of files to only those of the format you are interested in you will need to click on the "List Files of Type:" listbox and select the file format you want. Use the corresponding controls in the Insert Picture dialog box to find the file you want to insert. Once you've found it you can click on the file name in the "File Name:" listbox and then click on K .
The image will be inserted in your slide. You can simply click and hold the left mouse button while pointing at the image and then drag the mouse to position the image where you want it.
Inserting a sound or video into a slide is similar to inserting images, except sound and video is accessed through a different menu option. Select the INSERT | OBJECT menu. The Insert Object dialog box will appear. There are two methods for inserting a sound or video object. You can either "Create New" which will startup the appropriate application for creating the type of object you've selected, or you can "Create from File" which will allow you to insert a sound or video file that has already been created.
If the object you want to insert has not been created yet then click on the "Create New" radio button. Select the type of object you want to create from the "Object Type:" listbox and then click on K . The corresponding application for creating the chosen type of object will be launched. You can then use this application to create the object. When you exit the application the newly created object will be inserted in the current PowerPoint slide.
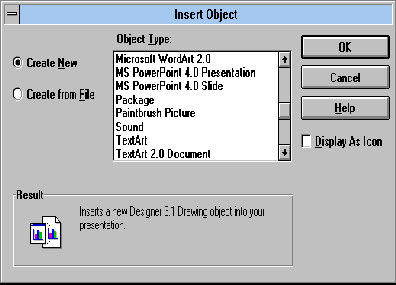
If the object you want to insert does exist already then click on the "Create from File" radio button. The Insert Object dialog box will change to prompt you for a file to insert. You can use the Browse button to search through all your files to find the object you want to insert. Like all inserted object you can position the object anywhere in your slide.
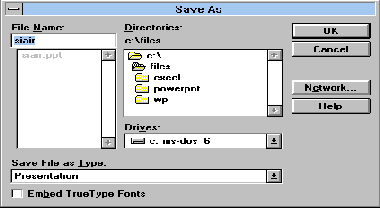
Once you have created your presentation, or at anytime while working on your presentation, you can save it to a file by choosing FILE | SAVE from the menu. Enter a name for your presentation (8 characters maximum) in the File Name box and click on <OK> .
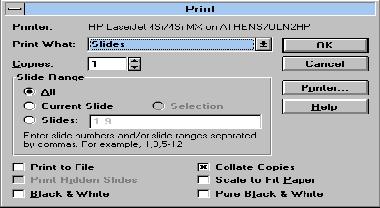
You can print out your slides one, two, three, or six to a page and provide them as handouts for your audience. Your Notes Pages can be printed as well as your outline view. Choose FILE | PRINT from the menu.
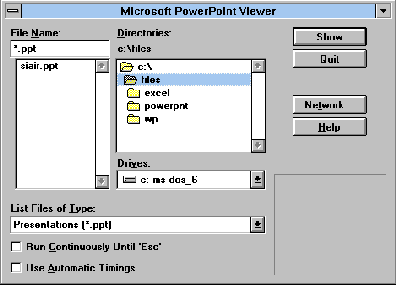
Once your electronic slides have been completed and saved to a .PPT file you can view the presentation with the PowerPoint Viewer program. This program allows you to only run and view your presentation and does not allow you to make any changes.
You will need to have your presentation file (filename.PPT) and the PowerPoint Viewer program on the computer system you plan to use to present your slides. The PowerPoint Viewer program is PPTVIEW.EXE and can be freely copied and distributed.
Run PPTVIEW.EXE from Program Manager in Windows. The PowerPooint Viewer program will prompt you for the presentation file to run. In addition you may want to choose to have the presentation run continuously until the E key is pressed. In order to run your presentation continuously you must either have set a specific time-delay for each slide or you must enable the automatic timing option in the PowerPoint viewer program. Otherwise, you simply press the spacebar or right arrow keys to advance to the next slide and press the left arrow key to backup to the previous slide.
 PowerPoint Viewer Program
![]()
![]()
![]()
![]()